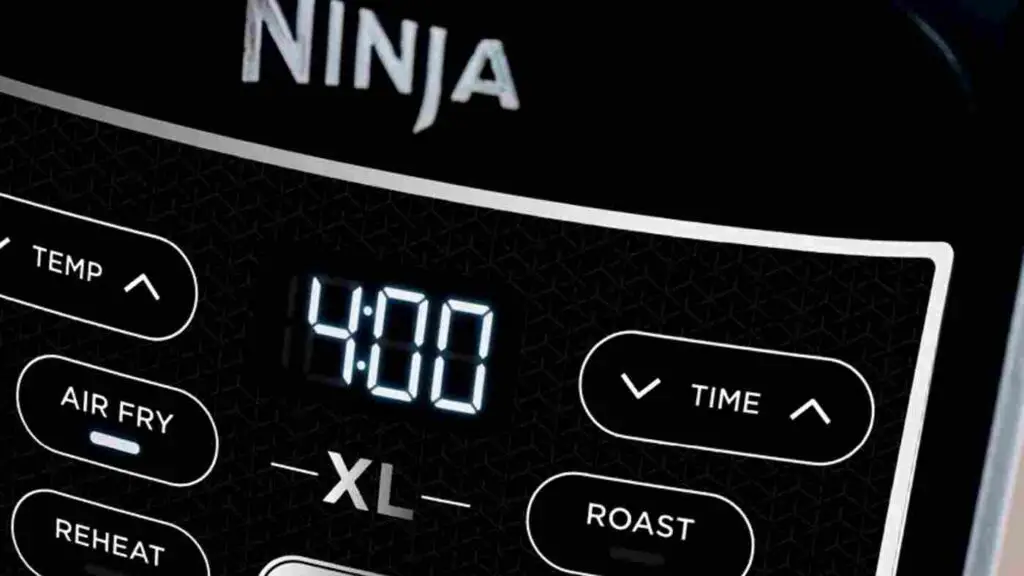
You can find four different cooking settings on the control panel of a ninja air fryer. All these settings have unique default temperature ranges.
According to requirements, you can use reheat, air fry, dehydrate, and roast settings.
The default temperature range of the roasting setting on the Ninja Air Fryer is 375℉ to 400℉ which is used for cooking soft meats, baked treats, vegetables, etc. It cooks food at higher temperatures and takes less time than Air fry mode. Browns the outside and imparts flavor to the interior of the cooked dish.
Let’s understand more regarding the roast setting on the ninja air fryer.

Table of Contents
What does the Roast Feature Do On The Ninja Air Fryer?
You can use a roast feature on the ninja air fryer as a roaster oven. You can cook tender meats, baked treats, vegetables, et cetera. If you want to try any roast recipe, just set the roast setting on the ninja air fryer. Set the temperature between 375℉ to 400℉ temperature range.
The air fry and roast functions on this unit allow you to set similar temperature ranges, but both work differently. When you cook food with the roast setting, this takes a shorter time to cook food than in air fry mode at the same temperature.
However, when the roast function is on it circulates dry hot air around the food and makes it brownish from the outer and dry and flavored from the inside.
You can also roast vegetables and nuts inside the ninja air fryer basket. Just place the item inside the basket and turn on the setting from the control panel. A default temperature will be represented on the display.
Adjust the roast time according to requirements. There are temperature adjustment buttons upside the control panel that adjust the temperature range.
Although this feature is best for roasting meats, vegetables get roasted well with this setting.
Most people use a roast button on a ninja air fryer when they want to prepare meats and roasted veggies. This setting doesn’t require oil. However, if you want to use a little amount you can use it.
How to Use the roast setting on a Ninja air fryer?
This is very simple to use any setting on the ninja air fryer as well as the roast setting. If you’re new to this appliance, the first thing you should do is understand how to operate this unit. All the settings can be used with the same method, but the only difference is their functioning and default temperature ranges.
Here’re steps to use a roast setting on the ninja air fryer:
- Press the start button to turn on the appliance
- Now remove the cooking basket from the unit and put the food inside it that you want to roast.
- Press the Roast button on the control panel.
- The default temperature range will appear(at 375℉ and 400℉).
- Adjust the temperature level according to your recipe requirement.
- Select the cooking time. Once all these steps are done, the device will start running.
You can prepare the food before roasting it in the air fryer. No need to call a lot of oil when using this setting. Make sure the basket is clean and used oil-free, so you can get the best results from these settings.
NOTE: User cannot set temperature below 375℉ when selecting a roast setting. Food can be only prepared between 375℉ to 400℉ when the roast is selected on the ninja air fryer. However, you can change the default temperature.
What is the difference between Air Fry and Roast on Ninja Air Fryer?
This is necessary for users to understand when to use air fry and when to use the roast setting on a ninja air fryer. Both settings run on higher temperatures, but don’t provide the same results.
The air fryer cooks any food at a higher temperature for a long time, but the roast setting takes a shorter time to cook a dish at a similar high-temperature range.
The Air Fry setting makes food crispy and crunchy which the roast setting cannot do. On the other hand, the roast feature can prepare different meats which the air fryer setting cannot do.
For example, If you want to make french fries, you have to select air fry on the control panel. If you want to prepare roasted meat, you have to go for a roast setting only.
Both settings provide a difference in cooked food texture and flavor. If the recipe contains a roasting requirement, go for roast settings, or if there is a requirement for frying, use little oil and select the air fry function.
You can only find the real difference in both settings’ results when you try some air fry and roast recipes by yourself.
Final Thoughts!
You can use recipe instructions to know if your dish requires it to be roasted or not. If it is a roasted recipe, select the roasted setting on the air fryer.
Don’t set a longer time for roasting than you do with the air fry feature.
However, the recipe you want to try also has cooking duration instructions. Use them for preparing your food.
